Checking and Changing the Reading Order in PowerPoint
By default, the PowerPoint Slides assume that you are adding information to the slide in the correct order. If you add a graphic or text box after the fact, or rearrange the items on the slide, it does not recognize the visual order – only the chronological one. This can create confusion if someone is using a screen reader and the items are read out of logical order.
Pro Tip
You can test the order by using the (Tab Key). Each tab will highlight the next item in the order it will be read.
Two Methods
There are two ways to check and change the reading order of items on a slide – the Reading Order Pane or Selection Pane.
Reading Order Method
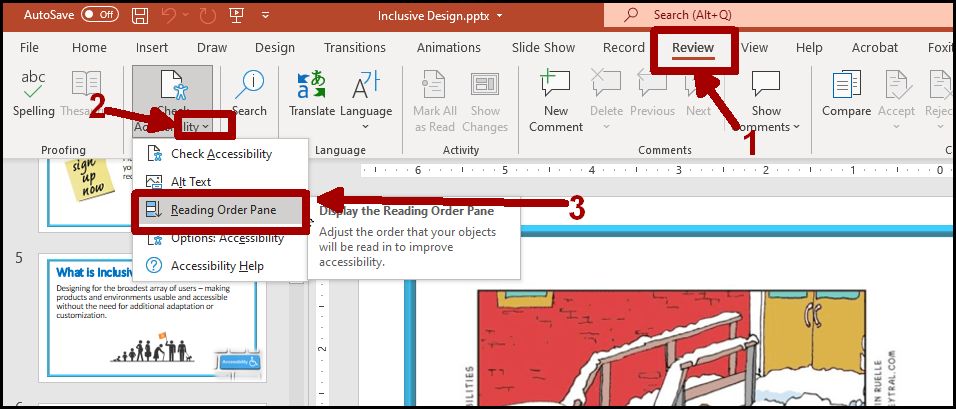
- Select the Review Tab from across the top of the screen
- Use the down arrow in the Accessibility Box – this will open a drop-down menu.
- Select Reading Order Pane from the menu – this will open a side panel to the right
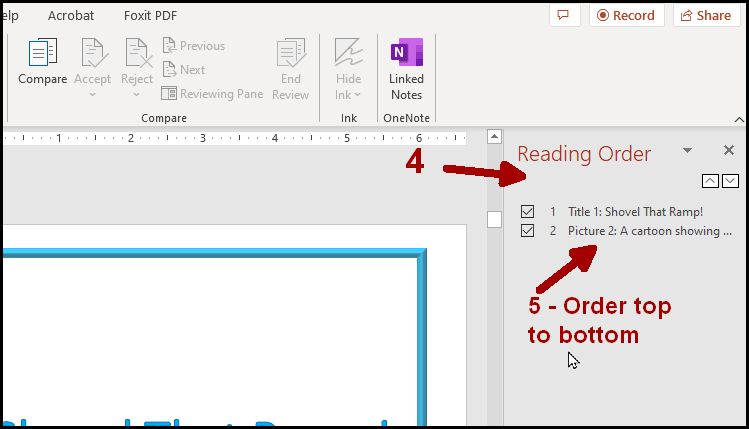
- Use the Reading Order Panel to arrange the items on the slide – selecting an item in the right pane will highlight it on the slide
- The order the items will be read are from the top to bottom of the list. So, arrange the items in the list with the first thing to be read at the top and work down.
Steps 1-3

Steps 4-5

Selection Pane Method
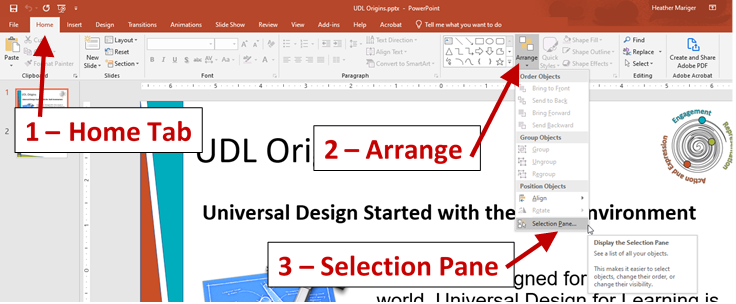
- Select the Home tab across the top of the screen
- In the Drawing Box, select Arrange – this will open a menu
- Choose Selection Pane – his will open a pane to the right of the slide*
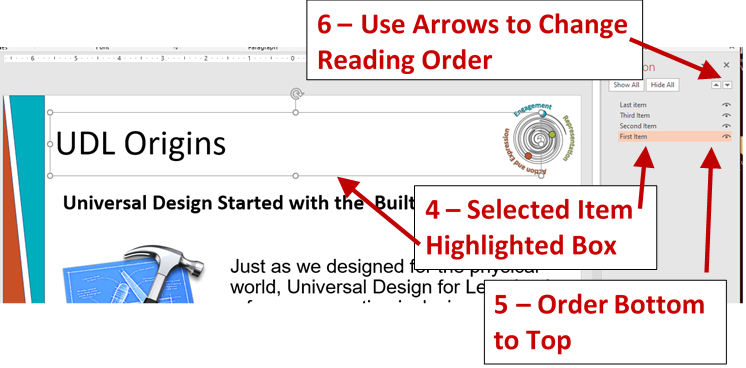
- Selecting an item in the right pane will highlight it on the slide
- The order the items will be read are from the bottom of the list up. So, arrange the items in the list with the first thing to be read at the bottom and work up.
- Use the arrow to move the items into the correct order.
*Note: you can also use Shortcut Keys (Alt) + (F10) to open the selection pane.
Steps 1-3

Steps 4-6
