Headings in Google Docs
Headings are important to help users understand the structure of your document and the information that it contains. Using the built in Styles function in Google Docs not only helps to create a consistent visual appearance but will also allow screen reader users to easily navigate and understand your document.
Reminders:
- Avoid the “Title” and “Subtitle” styles – always start your document with “Heading 1” (H1).
- Nest headings in proper order – e.g. H3s should be nested under H2 and H4s under H3. H4 should not be nested directly under H2.
Creating Headings
Method One – Using the Menu Ribbon
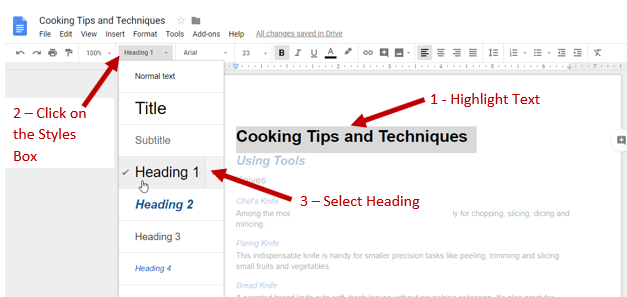
- Highlight the text you want to make into a heading (tip: you can double-click to highlight a full block of text)
- Look for the Styles Box along the menu ribbon (it is usually between the zoom and font choice pull down menus)
- Use the pull down menu to choose the appropriate Heading – this will automatically change the look of the highlighted text to that style

Method Two – Using the Format Tab
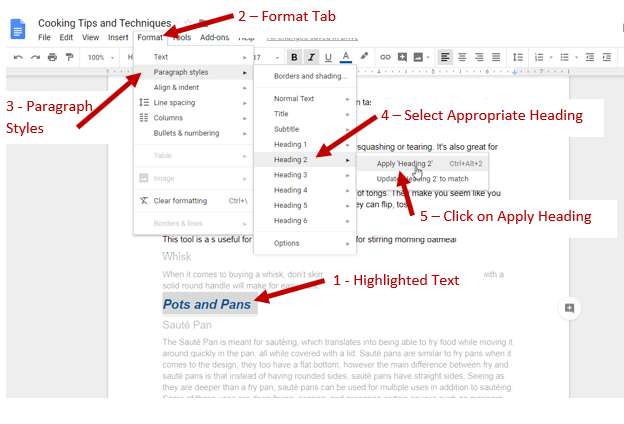
- Highlight the text you want to make into a heading (tip: you can double-click to highlight a full block of text)
- Select the Format Tab – this will open a pull down menu
- Mouse over Paragraph Styles – this will open a list of styles
- Mouse over the appropriate Heading – this will open a list with two options
- Select “Apply Heading …” this will automatically change the look of the highlighted text to that style

Modifying Headings
One your headings are in place, it is very easy to change the look of your styles across the document.
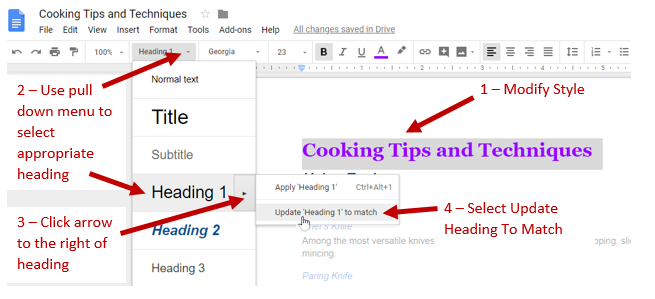
- Highlight the heading you want to change and change the look using color, font, size, bold, italic etc…
- Use the pull down menu in the Styles box to find the appropriate heading
- Click the arrow to the right of the style title
- Select “Update heading to match”
- All headings of the selected type will now look like the one that you modified

Check Your Headings
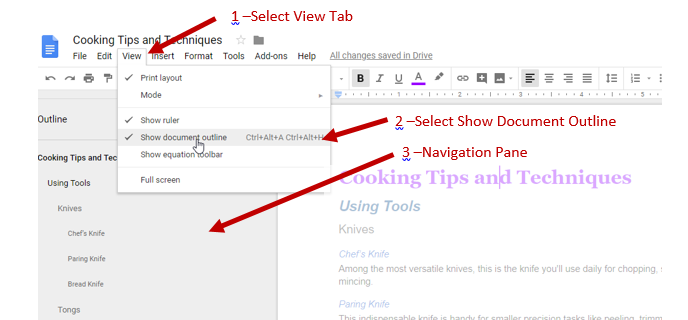
There is a quick and easy way to check that all of your headings are identified and correctly nested – you can use the built in Navigation Pane tool. When opened, it creates an outline of your document where you can easily see the headings and their hierarchy.
- Choose the VIew tab across the top of the screen
- Select Show Document Outline from the drop down menu
- There will be a checkmark to the left of the option when it is active
- The Navigation Pane will open to the left of the document.

