Alt-Text for Google Docs
Pictures can help to enhance learning and add interest to documents. However, students using screen readers are not able to see the graphic and may miss important information if no alternative text is provided.
Reminders:
- The alt-text should provide the same information that a person looking at the graphic would get
- Alt-text should provide meaningful information in the context of the document so the information you include for a given image may vary depending on how it is being used in that document.
- Alt-text should convey the same information as the graphic itself. Do not include additional information as alt-text.
- Be concise – alt-text should be short and to the point
- When writing alt-text, you don’t need to put “picture of” or “image of” into the description – just relevant information about the image itself
- If an image contains text, that text will often be the best option to put enter as the alt-text
Important Note:
Automated accessibility checkers can only tell that there is something in the alt-text field – they cannot judge if it is useful or meaningful information (or just the file name) – always check each graphic yourself to make sure that the information is appropriate and accurate.
How to Add or Check Alt-Text
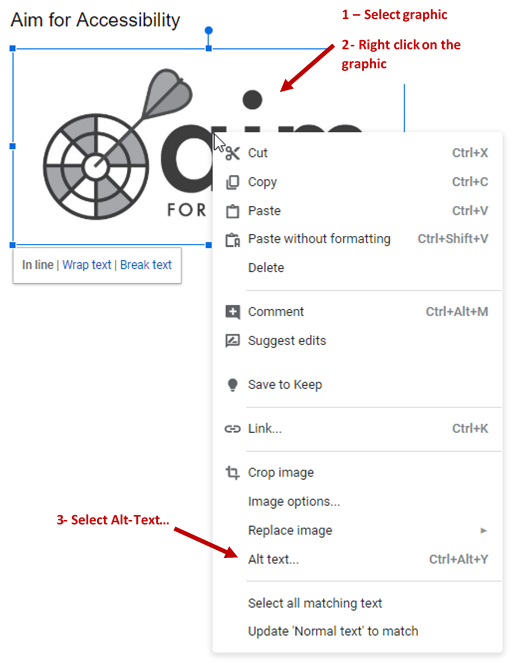
- Select the graphic
- Right click (or use keyboard shortcut Shift+F10) on the graphic
- Note: you can also use the keyboard shortcut (Ctrl+Alt+Y)
- Select Alt Text… from the list
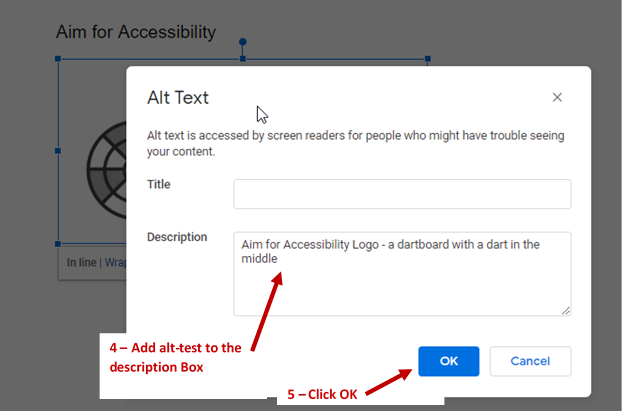
- Check or add the alternative text to the Description box
- Do not add any text to the Title box
- Click OK


